Starting New Project
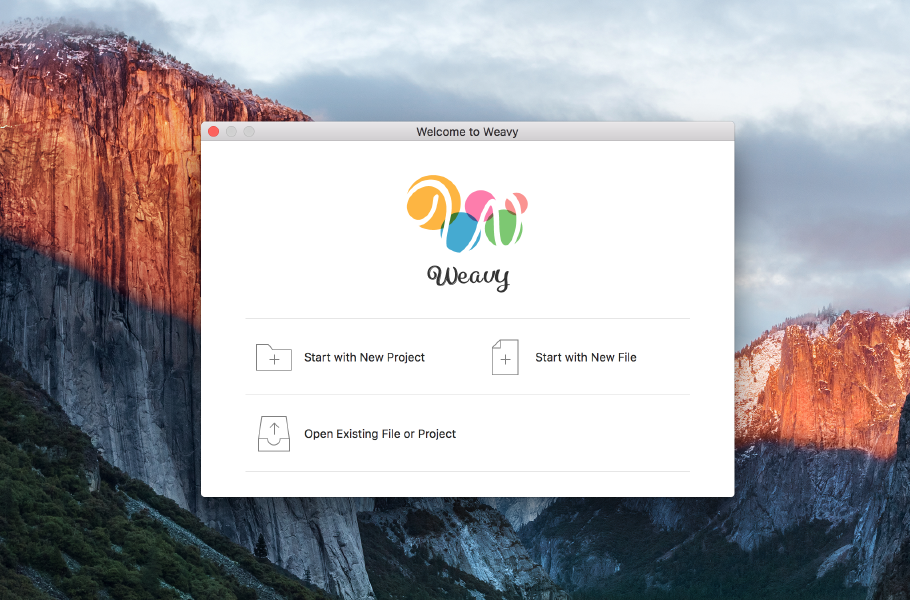
"Welcome to Weavy" Screen
Open the "Welcome to Weavy" Screen, Click "Start with New Project".
On the Save Dialog, input the name of the new project and click "Create Project" button.
Optionally, you can choose the "Project Base" as the starting point of the new project. Probably "bootstrap" is a good choice when you plan to create a responsive website.
Build and Preview
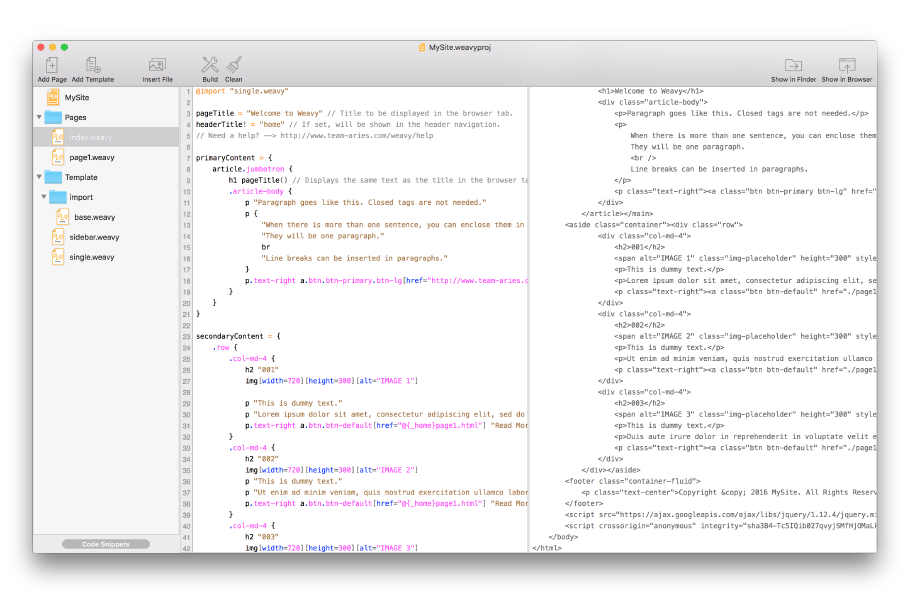
Click "Show in Browser" button at the toolbar. It will compile all the pages in the project, and show the selected page in the web browser.
Then, click "Show in Finder" button at the toolbar. It will open the project folder in Finder. HTML files are placed in "Build" subfolder.
Editing the Code
You can edit each page with the code editor pane on the project window. Result HTML tags are shown anytime in the pane next to the code editor.
According to the rule of the language, tags are simply described by their name. Sentences are enclosed by quotation marks. For example, a top-level heading is described like this.
input weavy

h1 "Heading"
output HTML

<h1>Heading</h1>
Note that closed tag is not needed in the weavy language.
Next, paragraph is described like this.
input weavy

p "Sentence."
output HTML

<p>Sentence.</p>
When the paragraph contains more than one sentence, enclose the sentences by braces.
input weavy

p {
	"One"
	"Two"
}
output HTML

<p>
	One
	Two
</p>
Tag attributes are described like CSS selectors.
input weavy

h1.class-name "......"
output HTML

<h1 class="class-name">......</h1>
input weavy

p#the-id "......"
output HTML

<p id="the-id">......</p>
input weavy

img[alt="......"]
output HTML

<img alt="......" />
For example, a list of hyper-linked items goes like this.
input weavy

ul#the-links {
	li.item a[href="http://......"] "One"
	li.item a[href="http://......"] "Two"
	li.item a[href="http://......"] "Three"
}
output HTML

<ul id="the-links">
	<li class="item"><a href="http://......">One</a></li>
	<li class="item"><a href="http://......">Two</a></li>
	<li class="item"><a href="http://......">Three</a></li>
</ul>
"div" and "span" can be omitted if they have one or more attributes. Produces <span> if contains only sentences without line breaks. Otherwise, produces <div>.
input weavy

.wrapper {
	.inner "One"
	.inner "Two"
}
output HTML

<div class="wrapper">
	<span class="inner">One</span>
	<span class="inner">Two</span>
</div>
If needed, raw HTML tags can be inserted with extra braces.
input weavy

{<div>Raw HTML Tag</div>}
output HTML

<div>Raw HTML Tag</div>
Using Snippets
Practical code fragments written in the weavy language are provided at Weavy Collection .
Media Drop
Media files (images, etc.) can be imported into the project.
Choose the file in Finder, and then drag-and-drop it into the editor pane. It will generate the proper code like this.
weavy

img[src="@{_home}asset/image/your_file.png"]
Dropped files will be copied into "Build" folder in the project.
Adding Pages
The project contains template files. When you add a new page, the initial content of the page is produced from a template.
Project Window
Click "Add Page" button at the toolbar of the project window.
On the Save Dialog, input the name of the new page and click "Save" button.
On the Save Dialog, input the name of the new page. Choose the template that the new page will inherit from. Then, click "Save" button.
Templating
Template files in the project can be edited as same as the pages.
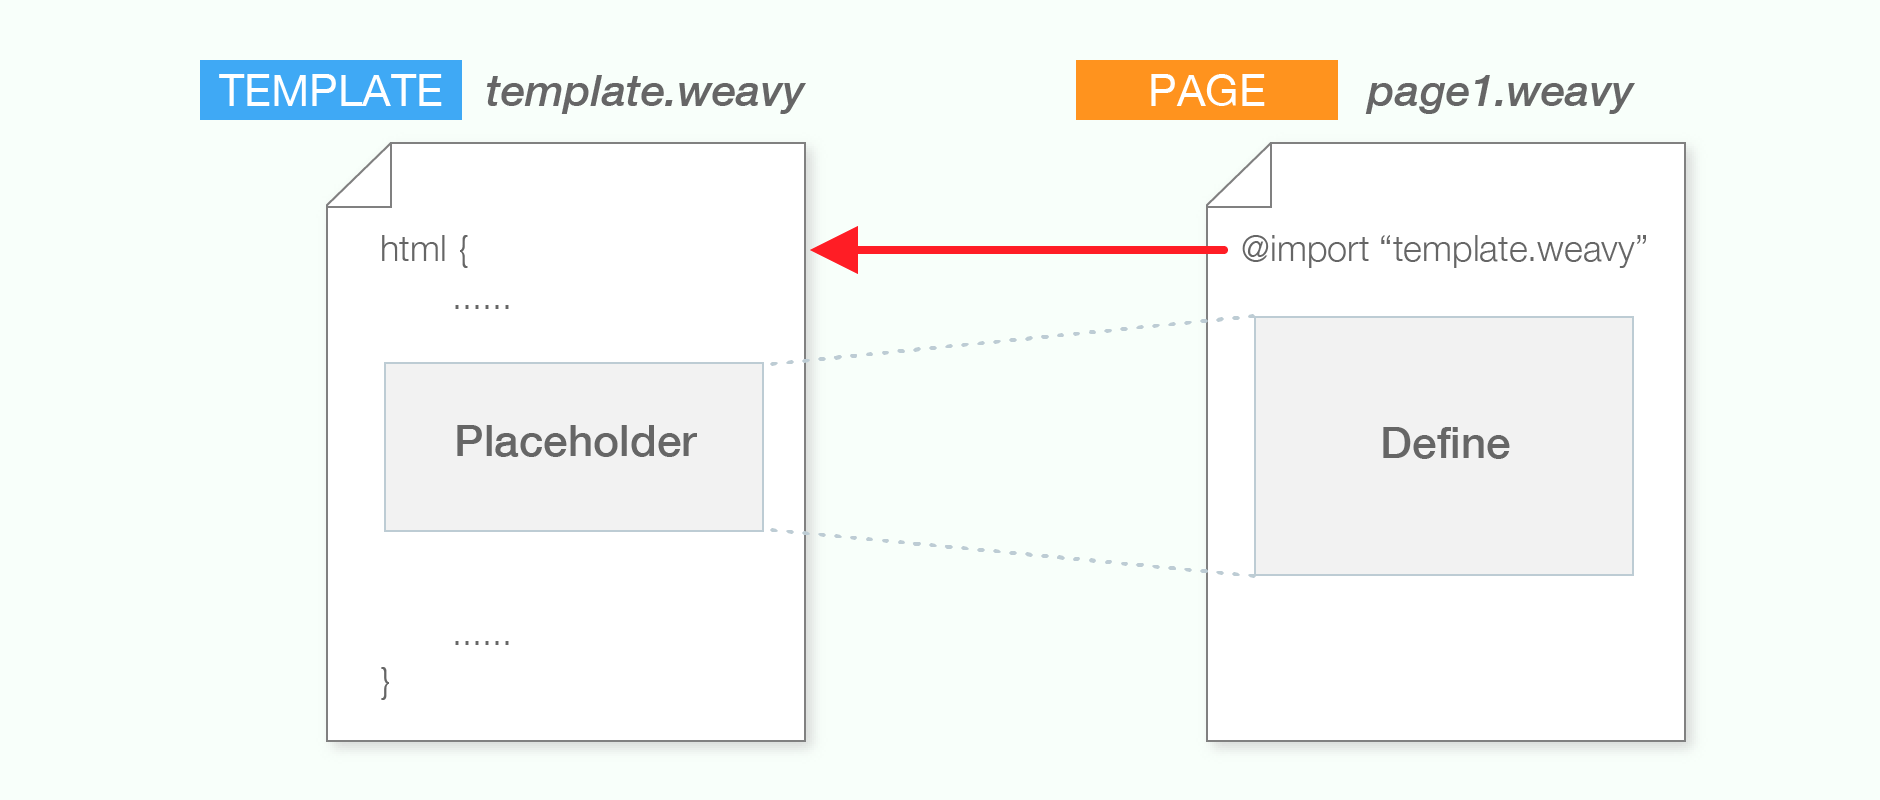
The template mechanism are enabled by three key features. These are "import", "placeholder", and "define".
Import
The import goes like this.
weavy

@import "sidebar.weavy"
This command designates which template in the project is used by the page.
Placeholder
Give a label followed by colon. The fragment of source code after the colon is treated as a placeholder. That can be replaced by the label.
weavy

primaryContent: {
	......
}
Define
Give a variable name followed by equal sign and corresponding value. When the defined variable name and the placeholder's label are matched, the content of the placeholder is replaced with the defined value.
weavy

primaryContent = {
	article {
		h1 "My Article"
		p {
			......
		}
	}
}
In addition, the defined value can be extracted at any place by its variable name.
weavy

primaryContent()
If you have any questions, contact us: support@team-aries.com